
10 Must-Know Tricks for Shiny Tile Cleaning
Ever looked at your bathroom tiles and felt a wave of pure defeat? Yeah, me too. That gunk between tiles has a PhD in stubbornness, and those water spots might as well be setting up permanent residence.
But here’s the thing: sparkling clean tile isn’t some mythical achievement only possible for professional cleaners or people with way too much free time.
These 10 tile cleaning tricks will transform your grimy surfaces into showroom-worthy shine without breaking your back (or the bank). I’ve personally tested every method here on my own disaster of a shower tile, and the results were frankly embarrassing—for the dirt, not me.
Ready to know the weird household ingredient that dissolves soap scum in seconds? It is likely located in your kitchen at this very moment.
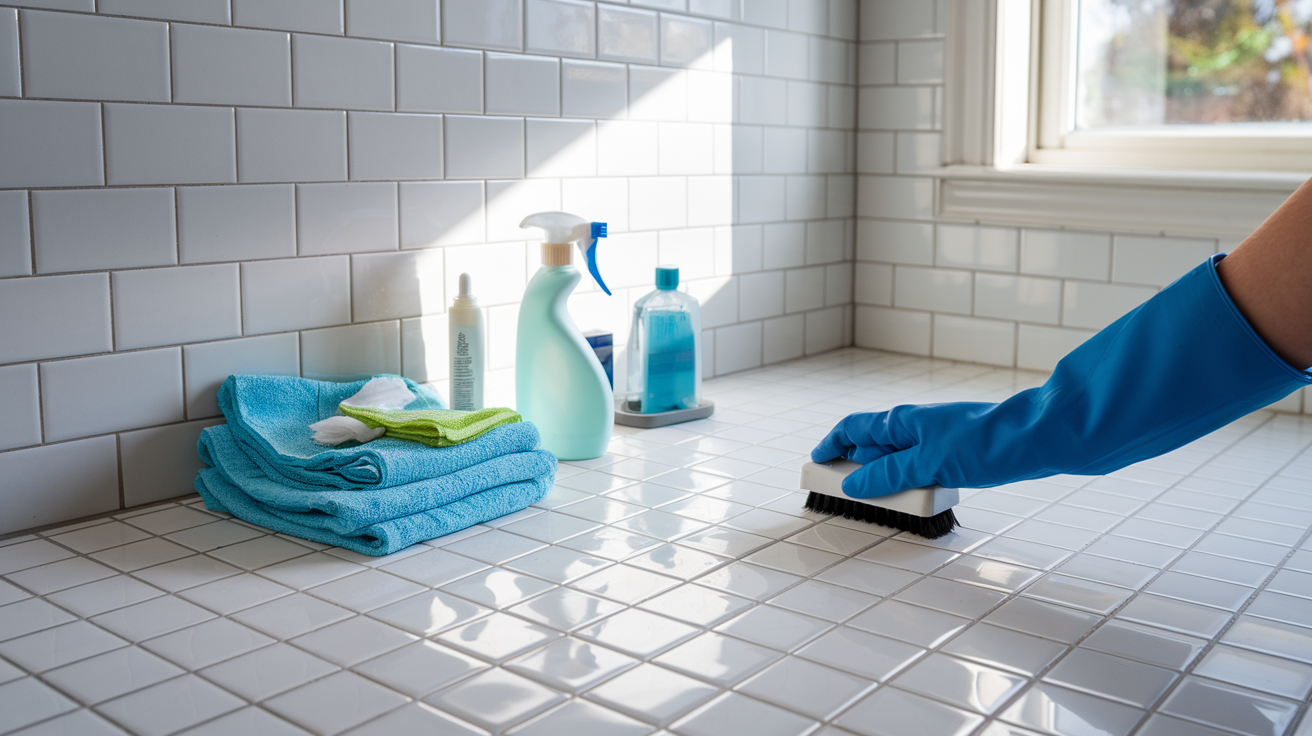
Essential Cleaning Supplies for Gleaming Tiles
Eco-friendly cleaning solutions that won’t damage grout
Ever noticed how regular cleaners leave your tiles looking dull after a few months? That’s because harsh chemicals eat away at your grout and tile finish. Believe me, I acquired this knowledge through difficult experiences.
White vinegar mixed with warm water (1:1 ratio) works wonders on most tile surfaces. The acidity cuts through grime without damaging the grout. For tough stains, make a paste with baking soda and water, apply it to the spot, and let it sit for 10 minutes before scrubbing.
Hydrogen peroxide is another secret weapon for white or light-colored grout. Pour it directly onto the grout lines, watch it bubble (that’s the cleaning action!), and rinse after 10 minutes.
For those who hate the vinegar smell (and who doesn’t?), add a few drops of essential oils like lemon or lavender. Your bathroom will smell amazing without those fake chemical fragrances.
Commercial environmentally friendly alternatives have made significant progress as well. Look for cleaners with plant-based ingredients and avoid anything with bleach, ammonia, or phosphates. Your tiles—and lungs—will thank you.
The right brushes and tools for different tile types
Using the wrong brush on delicate tiles is like using sandpaper on your face. Not a good idea.
For ceramic and porcelain tiles, a medium-bristle nylon brush works perfectly. The bristles are firm enough to clean effectively but won’t scratch your tiles.
Natural stone tiles (marble, granite, travertine) need special care. Always use a soft-bristle brush or you’ll regret it when you see the scratch marks. Been there, done that!
For those stubborn grout lines, an old toothbrush works surprisingly well. But if you’re serious about clean tiles, invest in a grout brush with angled bristles that can get deep into those narrow lines.
Here’s a quick reference for matching the right tool to your tile type:
| Tile Type | Recommended Brush | Avoid |
|---|---|---|
| Ceramic/Porcelain | Medium-bristle nylon | Wire brushes |
| Natural Stone | Soft-bristle | Anything abrasive |
| Glass Tiles | Microfiber or soft sponge | Scratchy pads |
| Textured Tiles | Stiff nylon brush | Soft cloths (too ineffective) |
Microfiber cloths: Your tile’s best friend
Throw away those paper towels right now. Microfiber cloths are game-changers for tile cleaning.
The microscopic fibers grab onto dirt particles instead of just pushing them around like regular cloths do. They’re absorbent enough to dry tiles completely, preventing those annoying water spots that make your cleaning job look amateur.
Keep separate microfiber cloths for different cleaning stages: one for applying cleaner, another for rinsing, and a third for drying. This prevents you from redepositing grime back onto clean surfaces.
Steam cleaners: When and how to use them
Steam cleaners are like the secret weapon professional cleaners don’t want you to know about. They use high-temperature vapor to break down dirt and sanitize without any chemicals.
Perfect for porcelain and ceramic tiles, steam cleaners can reach temperatures up to 245°F, killing bacteria and mold spores hiding in your grout. But beware—not all tiles can handle the heat.
Never use steam on unsealed natural stone, damaged tiles, or freshly grouted surfaces. The intense heat and moisture can cause serious damage. Always test in an inconspicuous area first.
To achieve optimal results, operate the steam cleaner at a slow pace across the surface, permitting the heat to infiltrate. Follow up immediately with a microfiber cloth to wipe away loosened dirt and excess moisture.
Pre-Cleaning Preparation Techniques
Clearing and protecting surrounding surfaces

You know what’s worse than dirty tiles? Accidentally staining your expensive furniture while cleaning those tiles. I have experienced that, accomplished it, and gained knowledge through difficult lessons.
Before you break out the mop and cleaning solutions, take 10 minutes to prep your space properly. Move all lightweight furniture out of the area completely. For heavier pieces you can’t relocate, lift and place furniture pads or small pieces of aluminum foil underneath the legs.
Got valuable baseboards or wooden surfaces nearby? Tape them off with painter’s tape. This simple step saves hours of unnecessary cleanup later. I once skipped this step and spent an entire afternoon removing cleaning solution splatter from my custom wood trim. Trust me, that’s not how you want to spend your Saturday.
For electronic equipment or delicate decorative items, don’t just cover them—remove them entirely from the cleaning zone. The mist from the cleaning solution disperses further than one might expect.
Here’s a quick prep checklist:
| Item | Action |
|---|---|
| Small furniture | Remove from area |
| Heavy furniture | Protect with furniture pads |
| Baseboards/trim | Cover with painter’s tape |
| Electronics | Remove from room |
| Fabric items | Cover or remove |
| Plants | Move to another room |
Dust removal tricks before wet cleaning
Jumping straight to wet cleaning is a rookie mistake. You’ll just create muddy streaks that are harder to remove.
Grab a microfiber dust mop—not a broom—and sweep the entire tile surface thoroughly. Those little dust particles that you can barely see? They become your worst enemy once water hits them.
For corners and edges where dust loves to hide, wrap a microfiber cloth around a yardstick, secure it with a rubber band, and sweep those hard-to-reach spots. This trick works better than any fancy tool I’ve ever bought.
Got a leaf blower? For outdoor tiles or well-ventilated indoor spaces, a quick blast on the lowest setting moves dust from tight corners like nothing else. Just make sure to close doors to other rooms first!
A slightly damp (not wet) microfiber cloth works wonders for picking up the finest dust particles that dry sweeping misses. Dampen it just enough so it doesn’t leave moisture behind.
Testing cleaning solutions on inconspicuous areas
Nothing crushes your spirit faster than watching your beautiful tiles discolor because you used the wrong cleaning solution. Always, always test first.
Find a small section behind furniture or in a corner and apply your chosen cleaner. Wait 10 minutes—not just 30 seconds—to see if any discoloration, etching, or damage occurs.
Different tile materials react differently:
- Ceramic and porcelain can usually handle acidic cleaners
- Natural stone (marble, travertine) will etch with anything acidic
- Slate and quarry tiles can be sensitive to strong alkaline cleaners
For homemade solutions, test every batch. Just because vinegar worked fine last time doesn’t guarantee this time will be the same, especially if you’ve adjusted the concentration.
 for a Complete Transformation
A. Homemade grout cleaners that actually work
Dirty grout lines can make even the cleanest tiles look awful. Trust me, I’ve been there – scrubbing away with store-bought cleaners that cost a fortune and barely work. But here’s the good news: your kitchen already has everything you need.
My go-to miracle mixture? Baking soda and hydrogen peroxide. Mix 1/2 cup baking soda with 1/4 cup hydrogen peroxide to create a paste. This stuff tackles years of grime without the harsh chemicals. For extra cleaning power, add a tablespoon of dish soap.
White vinegar and baking soda is another powerhouse combo. The fizzing reaction when these two meet literally lifts dirt from the grout. Make a paste with 2 parts baking soda and 1 part white vinegar.
For those tough kitchen grout stains with grease? Try this:
- 1/4 cup baking soda
- 2 tablespoons dish soap
- Few drops of lemon essential oil
Mix it up, apply to the grout, and let it sit for 20 minutes before scrubbing.
B. The toothbrush technique for stubborn grout stains
That old toothbrush in your bathroom drawer? It’s about to become your best grout-cleaning buddy. But there’s a technique to it – random scrubbing won’t cut it.
Start by wetting the grout lines slightly. Apply your cleaner of choice directly to the grout lines (not the whole tile). Now, here’s the key: use small, circular motions with moderate pressure. Many people make the mistake of scrubbing back and forth, which only pushes dirt deeper into the grout.
For corners and tight spaces, angle the toothbrush to get the bristles right into the crevice. An electric toothbrush works even better if you have an old one – the vibration does half the work for you.
Pro tip: After scrubbing each section, wipe with a damp microfiber cloth before moving to the next area. This prevents the dirty solution from drying back into the grout.
C. Steam cleaning for deeply embedded dirt
When homemade cleaners and elbow grease aren’t enough, steam cleaning is your nuclear option. The high heat breaks down years of buildup and sanitizes at the same time.
Handheld steam cleaners work well for small areas, but for bathrooms or kitchens, invest in (or rent) a larger steam mop with grout attachments. These usually have pointed nozzles that direct steam right into the grout lines.
The beauty of steam? It contains no chemicals and eliminates 99.9% of germs. This is especially important in bathroom grout where mold and mildew love to hide.
Work in small sections, holding the steamer about half an inch from the grout for 10-15 seconds. Any longer might damage the grout. Proceed promptly with a sturdy brush as the dirt is being loosened.
D. Grout sealing: The final step for lasting results
Cleaning grout is hard work. Make it last by sealing afterward. Grout is porous – like a tiny sponge between your tiles. Without sealer, it absorbs everything from coffee spills to shower water.
Before sealing, make sure the grout is completely dry – at least 24 hours after cleaning. Use a small brush applicator or look for spray-on sealers with precision tips. Apply in small sections, wiping excess from the tiles before it dries.
For high-traffic or wet areas like shower floors, choose a penetrating sealer rather than a membrane-forming one. These allow the grout to breathe while still providing protection.
How often should you seal? Kitchen backsplashes need resealing every year, while bathroom floors might need it every six months.
E. When to replace versus clean grout
Sometimes, no amount of cleaning will bring grout back to life. Here’s how to know when it’s time to replace instead of clean:
- Crumbling grout that falls out when you touch it
- Deep cracks wider than 1/8 inch
- Large sections of missing grout
- Black mold stains that don’t budge with bleach
Grout removal isn’t as daunting as it sounds. Grout removal tools attach to oscillating multi-tools and make quick work of old grout. For small areas, manual grout removal tools work fine.
The typical lifespan of grout ranges from 8 to 10 years in areas with moderate usage. In showers? Expect half that. If your grout is approaching those timelines and showing signs of wear, replacement might be more cost-effective than constant deep cleaning.
Removing Stubborn Stains from Different Tile Types
Natural stone tile cleaning methods
Got stubborn stains on your natural stone tiles? I feel your pain. Natural stone like marble, granite, and travertine looks amazing but can be super fussy when it comes to cleaning.
First thing you need to know – never use vinegar or acidic cleaners on natural stone. That’s a rookie mistake that’ll etch your beautiful stone faster than you can say “expensive mistake.”
For most everyday stains on marble or limestone, mix some pH-neutral stone cleaner with warm water. Don’t have specialized cleaner? Mild dish soap works in a pinch, but don’t make it a habit.
Oil stains giving you grief? Make a poultice by mixing baking soda with acetone into a paste. Spread it over the stain, cover with plastic wrap, and tape the edges. Let it sit overnight – the mixture pulls the oil out of the stone. Next morning, gently scrape it off and rinse.
For those stubborn rust stains on granite, you’ll need a poultice with a rust remover specifically formulated for natural stone. Regular rust removers will damage the surface, so don’t even think about it.
Ensure that you seal your natural stone tiles every 6 to 12 months. A good sealer prevents stains from penetrating in the first place!
Ceramic and porcelain tile rescue techniques
Ceramic and porcelain tiles are tough cookies, but they still get stained. The good news? You can be more aggressive with your cleaning approach.
For those impossible-looking stains, try making a paste with hydrogen peroxide and baking soda. Apply the solution to the stain, allow it to rest for 10 minutes, and then scrub using a stiff brush. Works like magic on coffee, tea, and food stains.
Grout lines between ceramic tiles collect dirt like nobody’s business. Combine oxygen bleach with warm water, use an old toothbrush to apply it to the grout, allow it to sit for 15 minutes, and then scrub. Your grout will look brand new.
Got scuff marks from shoes? A pencil eraser or a little WD-40 on a cloth will take them right off.
And for those baked-on food splatters in the kitchen? Apply a solution of dish soap and hot water, allow it to sit for 5 minutes, and then clean with a microfiber cloth.
Glass tile streak-free cleaning secrets
Glass tiles look stunning until they’re covered in streaks and fingerprints. I’ve been there.
The key to achieving streak-free glass tiles lies in the appropriate timing and the right tools. Clean them when they’re cool – not in direct sunlight or right after a hot shower when they’ll dry too quickly and streak.
Avoid using paper towels – they tend to leave lint residue behind. Microfiber cloths are your best friends here.
My go-to solution? Combine one part white vinegar with four parts distilled water in a spray bottle. The distilled water prevents mineral deposits that cause streaking.
Spray lightly, then wipe in a Z-pattern to prevent streaks. Conclude the process by polishing with a dry microfiber cloth.
For soap scum in shower glass tiles, heat white vinegar in the microwave until warm, then spray it on. The warm vinegar dissolves soap scum like nobody’s business.
Dealing with rust and hard water stains
Rust and hard water stains are the worst offenders in bathrooms and kitchens. They make even clean tiles look dirty.
For fresh hard water spots, equal parts white vinegar and water in a spray bottle does the trick. Spray, wait 5 minutes, wipe clean. For older, stubborn deposits, you’ll need to let the solution sit longer – up to 30 minutes.
Rust stains require a different approach. Commercial rust removers work well, but test in an inconspicuous spot first. Or try this homemade solution: make a paste of cream of tartar and hydrogen peroxide. Apply to the rust stain, let sit for 30 minutes, then scrub and rinse.
For severe hard water buildup, denture cleaning tablets are surprisingly effective. Dissolve several in warm water, apply to the stained region, and allow to sit for an hour prior to scrubbing.
Prevention is key – a squeegee after showering reduces hard water spots by 75%. Five seconds of effort saves hours of cleaning later!
Daily Maintenance Habits for Perpetually Clean Tiles
Quick spray-and-wipe routines
Nobody wants to spend their weekends scrubbing tile grout when they could be binging Netflix. The secret to perpetually clean tiles isn’t some magical cleaning solution – it’s consistency. Five minutes daily saves you hours of intensive scrubbing later.
Keep a small spray bottle filled with equal parts white vinegar and water in your bathroom. After showering, just mist your tiles while they’re still warm (the heat helps the solution work better), then wipe them down with a microfiber cloth. That’s it!
For kitchen backsplashes, I keep a separate spray bottle with a few drops of dish soap mixed with water. After cooking, a quick spritz and wipe prevents grease from building up and becoming that stubborn gunk that requires scrubbing later.
Pro tip: Store your cleaning cloths and sprays where you’ll actually use them. Having to walk to another room to grab supplies is often enough of a deterrent to skip your quick-clean routine altogether.
Preventing soap scum buildup
Soap scum is the arch-nemesis of beautiful tile. That white, filmy residue builds up so gradually you might not notice until it’s a major project to remove.
The game-changer? Switch to liquid soap instead of bar soap. Bar soaps are composed of talc and fatty acids that interact with the minerals present in your water, resulting in the formation of that persistent film. Liquid body washes leave significantly less residue.
To maintain your shower surfaces, utilize a squeegee following your bath. It only takes 30 seconds, yet it significantly enhances the overall appearance. Pull it down from top to bottom, removing water that would otherwise evaporate and leave minerals behind.
Another trick nobody talks about: Apply a thin layer of car wax to dry shower tiles every six months. It creates an invisible barrier that repels water and prevents scum from sticking. Just don’t apply it to your shower floor – that’s a slip hazard waiting to happen!
Keeping shower tiles mold-free
Mold loves three things: moisture, warmth, and darkness. Unfortunately, your bathroom provides all three.
The most effective daily habit? Proper ventilation. Run your bathroom fan during your shower and for 30 minutes afterward. If a fan is unavailable, consider opening a window. Lowering humidity serves as your primary method of protection.
Another game-changer is a daily shower spray. Here’s my DIY recipe that works better than store-bought versions:
- 1 cup water
- 1/2 cup hydrogen peroxide
- 1/4 cup rubbing alcohol
- 1 teaspoon dish soap
- 5 drops tea tree oil (natural mold inhibitor)
Mix in a spray bottle and mist your shower surfaces after bathing – no need to wipe.
For tile grout (mold’s favorite hiding spot), keep an old toothbrush handy and once weekly, give a quick scrub to any areas showing the earliest signs of discoloration. Catching mold early prevents it from penetrating deeper into porous grout where it becomes much harder to remove.
Addressing Problem Areas in Bathrooms
Tackling shower door tracks
Bathroom shower door tracks are a magnet for gunk. You know that black slime that builds up? It’s a mix of soap scum, mold, and who-knows-what that seems impossible to remove.
Here’s the trick: grab an old toothbrush, sprinkle some baking soda along the track, and spray white vinegar over it. That fizzing reaction? It’s breaking down all that nastiness. Allow it to rest for 10 minutes, then scrub using the toothbrush, and rinse thoroughly with hot water.
For really stubborn buildup, try this: fill the tracks with vinegar and let it soak for an hour. The residue will become softer and can be wiped away with greater ease.
Quick tip: After each shower, quickly wipe down the tracks with a squeegee or towel. This 30-second habit prevents 90% of buildup from forming in the first place.
Cleaning behind toilets and hard-to-reach spots
That awkward space between the toilet and the wall is everybody’s cleaning nightmare. But ignoring it turns your bathroom into a dust and germ playground.
Try wrapping a microfiber cloth around a yardstick or ruler, securing it with a rubber band. This DIY tool slips right into that narrow gap, grabbing dust and hair that’s been hanging out back there for months.
For the toilet base where it meets the floor (another gross spot), make a paste with baking soda and water. Apply it around the base, let it sit for 15 minutes, then wipe clean with a damp cloth. The paste pulls dirt from that seam like magic.
Don’t forget those hinges and mounting brackets! Spray them with a hydrogen peroxide cleaner and use a cotton swab to get into those tiny crevices.
Solving mildew issues in corners and crevices
Bathroom corners are mildew heaven – dark, damp, and often forgotten. That black spotting isn’t just unsightly; it can trigger allergies and respiratory issues.
Combine 1 part hydrogen peroxide with 2 parts water in a spray bottle. Thoroughly soak those moldy corners, wait 30 minutes, then scrub with an old toothbrush. The peroxide kills the mildew while lifting the stains.
To clean grout lines, often referred to as mildew highways, create a paste by combining 1/4 cup of baking soda with 1 tablespoon of hydrogen peroxide. Apply with a toothbrush, let sit for 10 minutes, then rinse.
Prevention is your best friend here. A small dehumidifier or even leaving the bathroom fan running for 30 minutes after showers dramatically reduces moisture – and mildew doesn’t stand a chance in drier environments.
Dealing with calcium deposits around fixtures
Those white, crusty deposits around faucets and showerheads? That’s calcium buildup from hard water, and it’s killing your bathroom’s shine factor.
The secret weapon against calcium is plain white vinegar. For faucets, immerse paper towels in vinegar and encase them around the impacted regions. Secure with rubber bands and leave overnight. By morning, those deposits will wipe right off.
For showerheads, unscrew them if possible and soak in a vinegar bath overnight. If you can’t remove it, fill a plastic bag with vinegar, secure it around the showerhead with a rubber band, and let it soak.
For stubborn deposits that won’t budge, try a mixture of equal parts vinegar and baking soda. The fizzing reaction helps break down even the toughest buildup.
Once you have completed the cleaning process, apply a light coat of car wax to your fixtures. This creates a protective barrier that makes it harder for calcium to stick in the future. Just don’t use this on shower floors – way too slippery!
Kitchen Tile Cleaning Challenges
Removing grease splatter effectively
Kitchen tiles take a serious beating. Nowhere is this more obvious than when grease flies everywhere during your weeknight cooking adventures. Those tiny oil droplets cling to your tiles like they’re holding on for dear life.
Here’s the truth about grease – it’s sneaky. You might not notice it building up at first, but one day you’ll look at your kitchen backsplash and wonder, “When did that turn yellow?”
The secret to handling grease is attacking it before it becomes a permanent resident. After cooking, grab a microfiber cloth and some warm, soapy water (dish soap works wonders here). Wipe down the tiles while they’re still warm from cooking – the heat helps break down the grease molecules.
For stubborn grease that’s been there since you made that epic Thanksgiving turkey, mix equal parts baking soda and water into a paste. Directly apply to the tiles, allow it to rest for 10 minutes, and then gently scrub using a soft-bristled brush. The mild abrasiveness cuts through grease without scratching your precious tiles.
Steam cleaners are absolute game-changers for kitchen tile. The hot vapor penetrates and lifts away grease without any chemicals whatsoever. Worth every penny if you cook regularly.
Tackling food stains without harsh chemicals
Food stains on kitchen tiles tell the story of every meal you’ve ever made. The splash of tomato sauce from the evening of pasta preparation? The turmeric that somehow jumped out of the curry bowl? They’re like little culinary souvenirs.
Vinegar and water (1:1 ratio) in a spray bottle is your new best friend. This dynamic duo tackles most food stains while being completely non-toxic. Spray generously, let it sit for 5 minutes, then wipe away. The acidity breaks down most food residues without damaging the tile or grout.
For colored stains like coffee or red wine, hydrogen peroxide works wonders. Apply it directly to the stain, watch it bubble (that’s the cleaning action happening), then wipe clean after a few minutes.
Lemon juice deserves special mention for light-colored tiles. Cut a lemon in half, sprinkle some salt on the tile, and use the lemon as a scrubber. The citric acid brightens while the salt gently exfoliates.
Maintaining backsplash brilliance
Your backsplash is the crown jewel of your kitchen. It deserves daily attention, not just crisis management when guests are coming over.
Prevention is the smartest approach. Apply a high-quality sealer to your backsplash tiles and grout every 6-12 months. This creates an invisible shield that repels water, oil, and food particles before they can penetrate.
Daily maintenance doesn’t have to be a chore. Keep a microfiber cloth nearby and quickly wipe down the backsplash after cooking. This 30-second habit saves hours of scrubbing later.
For weekly cleaning, a simple solution of warm water with a drop of mild dish soap will maintain that showroom shine. Refrain from using ammonia-based cleaning products – they deteriorate sealants as time progresses.
The grout lines between tiles are usually the first to lose their luster. An old toothbrush dipped in a paste of baking soda and water will revive them beautifully. Gentle circular motions work best.
Professional-Level Polishing Techniques
DIY buffing methods for extra shine
Want that magazine-worthy gleam on your tiles? The secret isn’t expensive cleaners—it’s all about buffing techniques. I’ve spent years perfecting these methods, and the results are mind-blowing.
Grab a clean, dry microfiber cloth and work in small circular motions. The pressure should be firm but gentle. Think of it like waxing a car—consistent motion is key. For ceramic tiles, try this trick: after your regular cleaning, spray a mixture of equal parts white vinegar and warm water, then immediately buff dry. The quick-dry technique prevents water spots and creates that mirror finish you’re after.
For marble or granite tiles, skip the vinegar (too acidic!) and go with a specialized stone polish. Apply a dime-sized amount to your cloth—not directly on the tile—and work it in with those same circular motions. Less is definitely more here.
Natural polishing solutions for different tile materials
Not all tiles are made the same, and what enhances one may harm another. Here’s what works for different materials:
For porcelain tiles:
- 1 cup warm water
- 1/4 cup baking soda
- 2 tablespoons lemon juice
Mix into a paste, apply with a soft cloth, wait 5 minutes, then buff off. The mild exfoliation provided by baking soda, combined with the inherent acidity of lemon, results in an extraordinary luster.
For slate or natural stone:
- 2 cups warm water
- 1 tablespoon Castile soap
- 5 drops tea tree oil
This mixture cleans while enhancing the natural colors in the stone. Follow with a few drops of mineral oil on your buffing cloth for a subtle, protective shine.
Microfiber dry-buffing tricks
Microfiber is your best friend for that final shine, but there’s a technique to it that most people miss.
First, pick the right microfiber—those with a higher GSM (around 300-400) work best for buffing. Fold your cloth into quarters to create multiple clean surfaces you can rotate through.
The game-changing trick? Slightly dampen one microfiber cloth with distilled water (tap water can leave mineral deposits), quickly wipe the surface, then immediately follow with a bone-dry microfiber cloth. This two-cloth method captures dust and prevents streaking like nothing else.
For extra stubborn water spots, try this pro move: breathe a small amount of warm air onto the spot, then immediately buff. The slight moisture from your breath helps lift the deposit.
Using olive oil for terra cotta tiles
Terra cotta tiles have a warm, rustic charm that deserves special treatment. Extra virgin olive oil—yes, the same one in your kitchen—works wonders here.
Apply a scant amount (about 1/2 teaspoon per square foot) with a lint-free cloth. The critical step most people mess up? Waiting time. Let the oil sit for 30 minutes to penetrate, then buff thoroughly with a clean, dry cloth until no oily residue remains.
This treatment not only creates a beautiful luster but also forms a natural barrier against stains. Do this quarterly for tiles that look centuries old in the best possible way.
Seasonal Deep Cleaning Strategies
Spring cleaning checklist for all tile surfaces
Tile cleaning need not be a year-round burden if approached strategically through seasonal deep cleaning. Spring is the perfect time to give your tiles that fresh start they deserve.
First, gather your arsenal:
- Microfiber mops and cloths
- pH-neutral tile cleaner
- Baking soda
- White vinegar
- Old toothbrushes
- Steam cleaner (if available)
Start by dusting off ceiling corners and light fixtures above tiled areas. That forgotten dust will eventually make its way down to your clean tiles if you don’t tackle it first.
Next, sweep or vacuum thoroughly before any wet cleaning. Those tiny particles act like sandpaper when you’re mopping, potentially scratching your beautiful tiles.
To clean bathroom tiles, combine equal amounts of vinegar and water in a spray bottle. Generously spray the mixture onto the shower walls and allow it to sit for 10 minutes prior to scrubbing.. The acid breaks down soap scum that’s built up over winter.
Kitchen backsplash looking grimy? Create a paste using baking soda and water, apply it to the grout lines, and scrub with an old toothbrush. Rinse thoroughly and be amazed at how white those lines get!
Don’t forget those often-neglected spots:
- Behind toilets
- Under kitchen appliances
- Transition areas between rooms
- Baseboards adjacent to tile floors
Winter salt and grime removal techniques
Winter brings unique challenges to tile maintenance. Road salt, slush, and moisture can wreak havoc on your floors.
Place absorbent mats at all entrances during winter months. This simple step prevents about 80% of debris from ever reaching your tiles.
For salt stains that have already formed, mix 1 cup warm water with 1 tablespoon dish soap. Gently scrub with a soft brush rather than using acidic cleaners which can damage grout.
Tough white salt residue? Try this pro trick: dilute white vinegar (1:3 with water) and apply only to the affected areas. Wait 2-3 minutes, scrub lightly, then rinse thoroughly. Do not allow vinegar solution to remain on natural stone tiles for an extended period!
Winter also means heavier indoor traffic as everyone stays inside. Rotate your furniture slightly to distribute wear patterns more evenly across your floor tiles.
The dry indoor heating can actually cause grout to contract and crack. Consider running a humidifier in tiled areas to maintain optimal moisture levels.
Preparing outdoor tiles for changing seasons
Outdoor tiles face the harshest conditions of all. They need special attention during seasonal transitions.
Fall prep is crucial. Clear all debris from outdoor tile surfaces and pressure wash before winter hits. Apply a penetrating sealer to porous tiles to prevent freeze-thaw damage. This creates a barrier that water can’t penetrate and then expand when frozen.
After winter, inspect for loose or cracked tiles. The freeze-thaw cycle can push tiles up or create new cracks. Address these immediately before they worsen.
Spring is ideal for a deep clean using a specialized outdoor tile cleaner. Focus on removing organic stains from fallen leaves and pollen that accumulated over winter.
For stubborn green algae that developed in shady areas, mix one part bleach with ten parts water. Apply with a sprayer, let sit for 10 minutes, then scrub and rinse thoroughly. Always test on an inconspicuous area first!
Summer preparation should include resealing if your outdoor tiles need it. Most sealants last 1-3 years, but harsh winters can degrade them faster.
Preventive Measures for Long-Lasting Cleanliness
A. Proper sealing schedules for different tile types
You know what ruins beautiful tile faster than anything? Skipping the sealing process. It’s like leaving your front door wide open during a rainstorm.
Different tiles need different sealing schedules, and getting it wrong can mean the difference between floors that look amazing for years and ones that look tired after months.
For natural stone tiles (marble, granite, travertine), you’re looking at resealing every 6-12 months. These prima donnas are porous and soak up spills like a sponge if not properly protected.
Ceramic tiles? You’ve got it easy. Most don’t need sealing at all – the glazed surface already acts as a barrier. But those grout lines? Seal them yearly or watch them turn from white to grimy gray in record time.
Porcelain is the low-maintenance champion. A good sealing every 2-3 years is plenty, unless we’re talking about your shower floor which might need annual attention.
Quick test to know if it’s time: Drop a small amount of water on your tile. If it beads up, you’re good. If it soaks in, grab that sealer ASAP.
B. Ventilation tricks to prevent moisture damage
Moisture is the silent tile killer. It creeps into grout, under tiles, and creates that perfect breeding ground for mold and mildew.
Open those windows after showers! Sounds obvious, but you’d be shocked how many bathroom tiles I’ve seen ruined because people skip this simple step. Even 15 minutes makes a huge difference.
Ceiling fans aren’t just for cooling. Run them during and after showers to pull moisture up and away from your beautiful tile work.
For bathrooms without windows (we’ve all been there), invest in a good dehumidifier. The $50 you spend now saves hundreds in tile repairs later.
Got plants in tiled areas? They release moisture too. Use pebble trays under pots to catch excess water rather than letting it sit on your tile.
C. Daily habits that minimize cleaning frequency
Want to know the secret to cleaning tiles less? It is what you engage in when you are NOT cleaning.
Squeegee shower walls after each use. Takes 30 seconds but prevents 90% of soap scum buildup and water spots. The shower squeegee is hands down the best $10 investment for tile longevity.
Wipe up spills immediately. Coffee, wine, pasta sauce – they all can stain grout even when tiles are sealed. The five-second rule applies double for spills on tile.
Dry bathroom floors with a towel after heavy use. Sounds excessive but prevents those nasty water spots and mineral deposits that eventually need scrubbing.
Use gentle cleaners daily rather than harsh ones weekly. Vinegar-water mist for quick wipedowns beats having to use heavy-duty cleaners later.
D. Mats and rugs: Strategic placement for tile protection
Mats aren’t just décor – they’re your first line of defense against tile damage.
Place entry mats outside AND inside doors. The outside mat catches dirt, the inside one traps moisture and any remaining debris. This two-step system keeps abrasive particles off your tiles.
Kitchen mats in front of the sink and stove prevent water damage and catch food spills before they hit your tile. Opt for water-resistant options that won’t trap moisture underneath.
In bathrooms, use mats with rubber backing that actually dry between uses. That constantly damp decorative bath mat? It’s slowly damaging the tile underneath.
Rotate your mats regularly. Even the best ones create uneven wear patterns if left in the same spot for years. Plus, this helps your tiles age evenly rather than having obvious protected zones.
Maintaining spotless, gleaming tiles is more than just an aesthetic choice—it’s about preserving your investment and creating a healthier living environment. From gathering the right supplies and preparing surfaces properly to tackling stubborn grout lines and addressing specific challenges in kitchens and bathrooms, these ten essential cleaning tricks can transform your tile surfaces from dull to dazzling. Remember that different tile types require tailored approaches, and consistent daily maintenance is the secret to effortless cleanliness.
Put these techniques into practice, and you’ll not only achieve professional-level results but also extend the life of your beautiful tile surfaces. Whether you’re polishing floors to a mirror finish, implementing seasonal deep cleaning routines, or adopting smart preventive measures, your dedication to proper tile care will pay dividends. Start implementing these tricks today, and enjoy the satisfaction of walking on, cooking near, and living with impeccably clean and shining tiles that make your entire home feel refreshed.
10 Must-Know Tricks for Shiny Tile Cleaning